Setting up OpenVPN on pfSense
I would like to have the ability to connect to my home network wherever I am in the world so I have decided to setup a VPN. I'm running pfSense as my router/firewall solution which makes this really easy!
There are a few reasons I'd like to do this:
- Ensuring that my traffic is encrypted when connected to a public network.
- Using my own Pi-hole DNS wherever I am in the world.
- Securely self hosting various services that I can access from anywhere. Using bitwarden in this way is something I'd like to explore in the near future.
- Ability to remotely manage my home infrastructure from anywhere.
I had originally planned to use Wireguard for my VPN solution as it was added to pfSense in version 2.5.0, however it has now been removed in version 2.5.1. You can read more in this blog post. This is extremely unfortunate but I'm sure it was done for the right reasons. I'll be keeping an eye on the progress of wireguard within FreeBSD & pfSense, hopefully any issues can be quickly resolved.
Getting Started
The pfSense documentation has a great guide on how to do this in it's recipe section so instead of going over each step in minute detail here is the relevant recipe. I'm just going to quickly run through it at a high level and provide information on various settings I changed. Also I'm not sure when the documentation is written but it differed slightly to what is the latest version as I'm writing this post, pfSense 2.5.1.
If you haven't checked out the recipe section of pfSense's documentation before I highly recommend you do so, it has a ton of information on how to perform various different tasks and setup all sorts of functionality.
The first thing we need to do is to go to VPN -> OpenVPN in the navbar at the top then click the link for the wizard which walks you through the process of getting everything setup.
I'm going to number the steps based on the order in which we go through them, you'll notice that the wizard within pfSense may jump a few steps at a time, this is due to the options we are choosing. We do not have to complete all 11 steps.
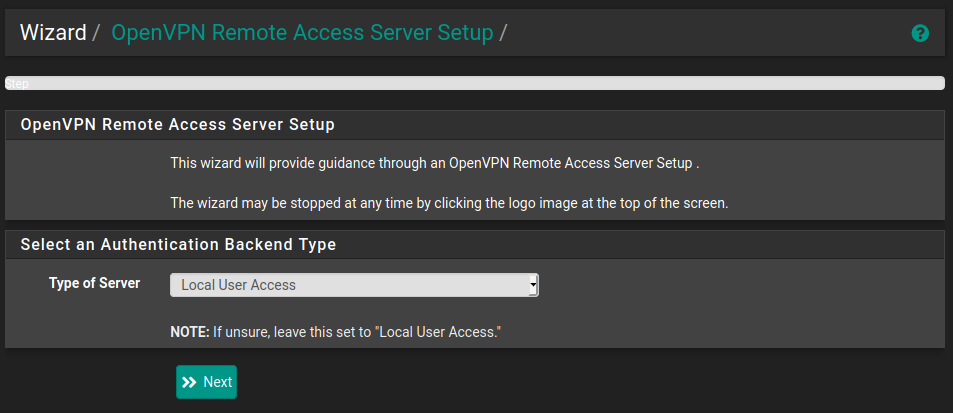
Step 1 - Authentication Backend
The first screen asks what authentication backend is to be used. We are just going to leave this on Local User Access and click next. In a later step we will create the user within pfSense itself.
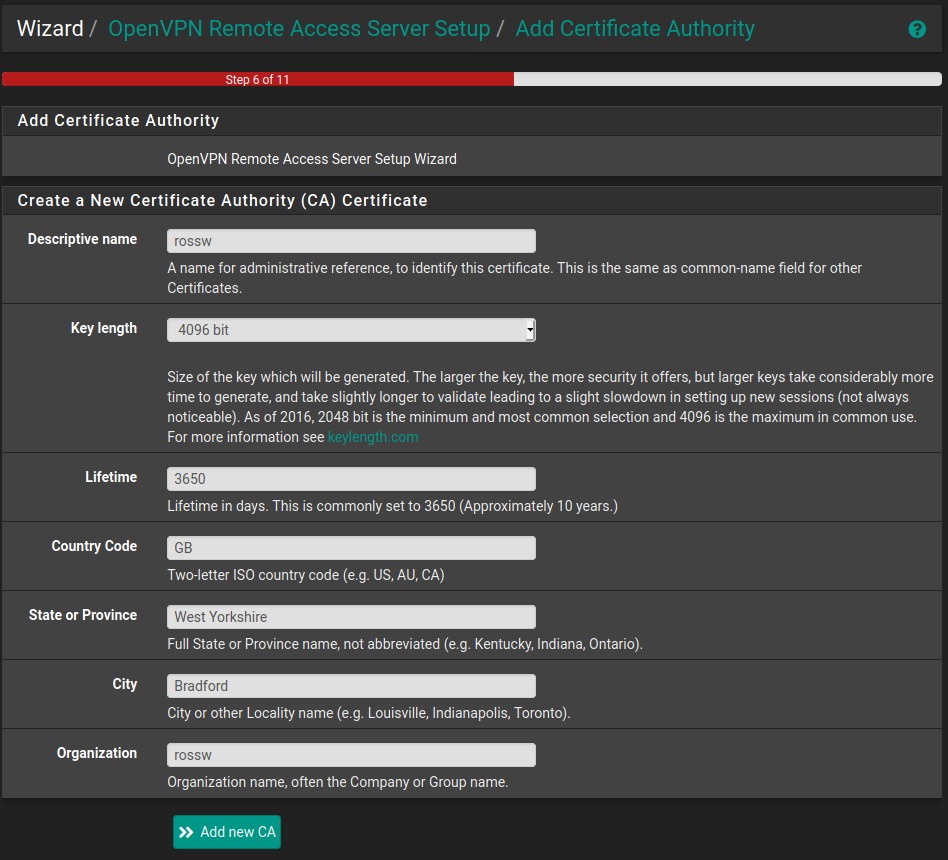
Step 2 - Creating a Certificate Authority
A certificate authority is required to generate & sign certificates used by clients to authenticate with the server. It can also revoke certificates.
For the purposes of this I'm just going to use rossw as my organisation but you should use whatever you feel would be the best bit and ensure that all the fields are filled in.
Once done we simply click Add new CA.
We only need to do this step once since you can continue to use this same Certificate Authority in future.
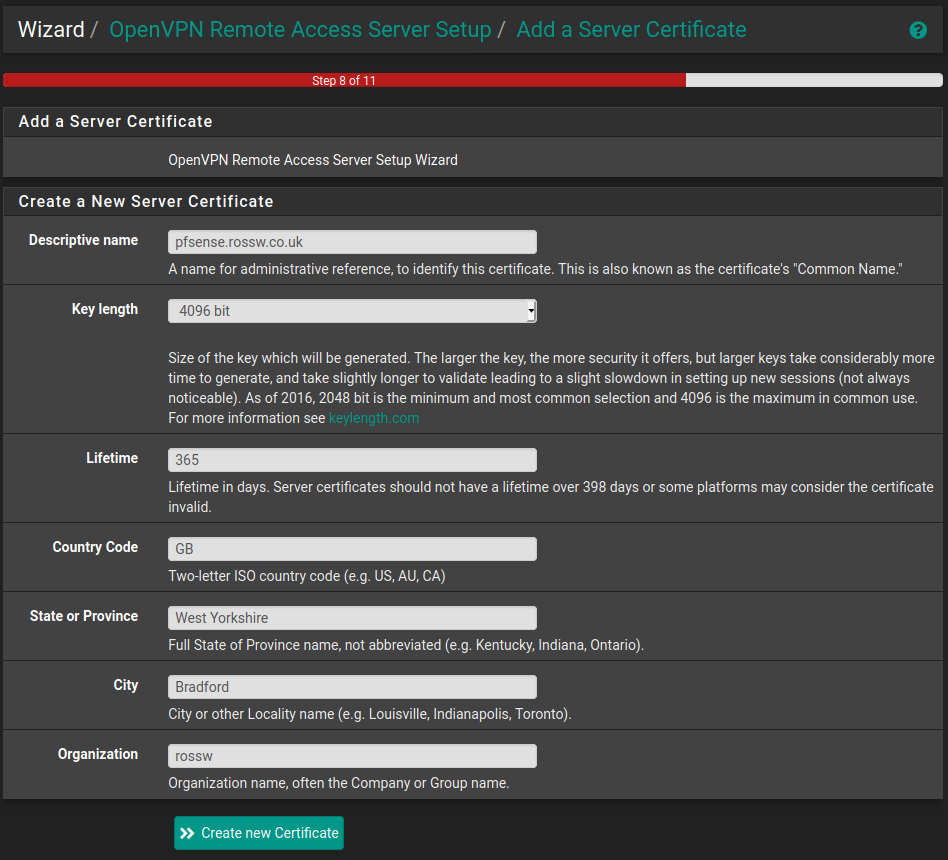
Step 3 - Create a Server Certificate
Now that we have a CA we need to generate a certificate that the server will use to identify itself to any clients that are trying to connect.
The pfSense documentation recommends using the hostname for the Descriptive name so I'll use pfsense.rossw.co.uk as an example here and once again the organisation will be rossw. You should once again use whatever makes the most sense for your use case.
This is very similar to the previous step and there is quite a bit of duplication from the so once it's complete click create new certificate and we will move on.
Step 4 - Server Setup
This next page can seem quite overwhelming at first since there are a lot of different options. However the recipe explains each of the options in plenty of detail, and in most cases the default is fine.
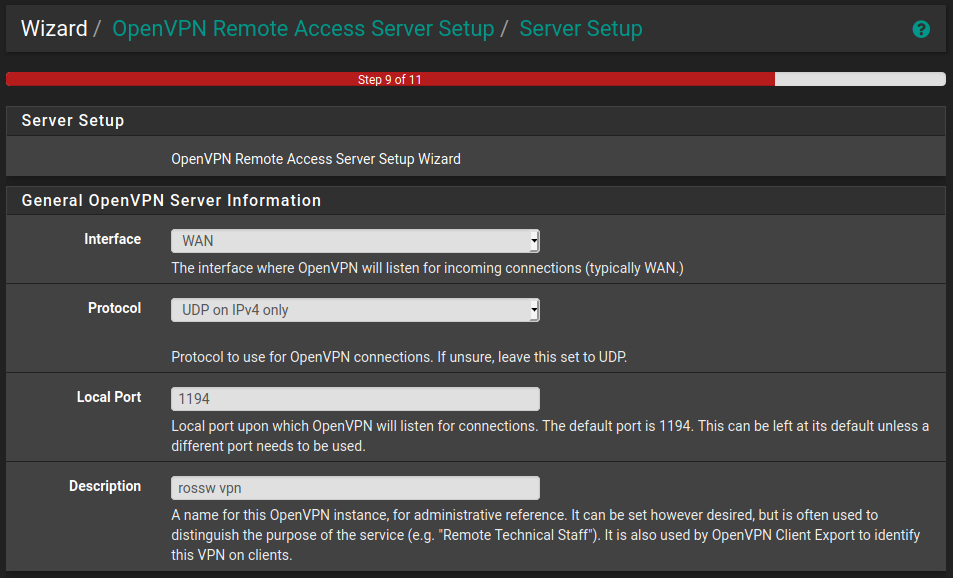
The general server settings are quite straight forward. I went with the defaults here.
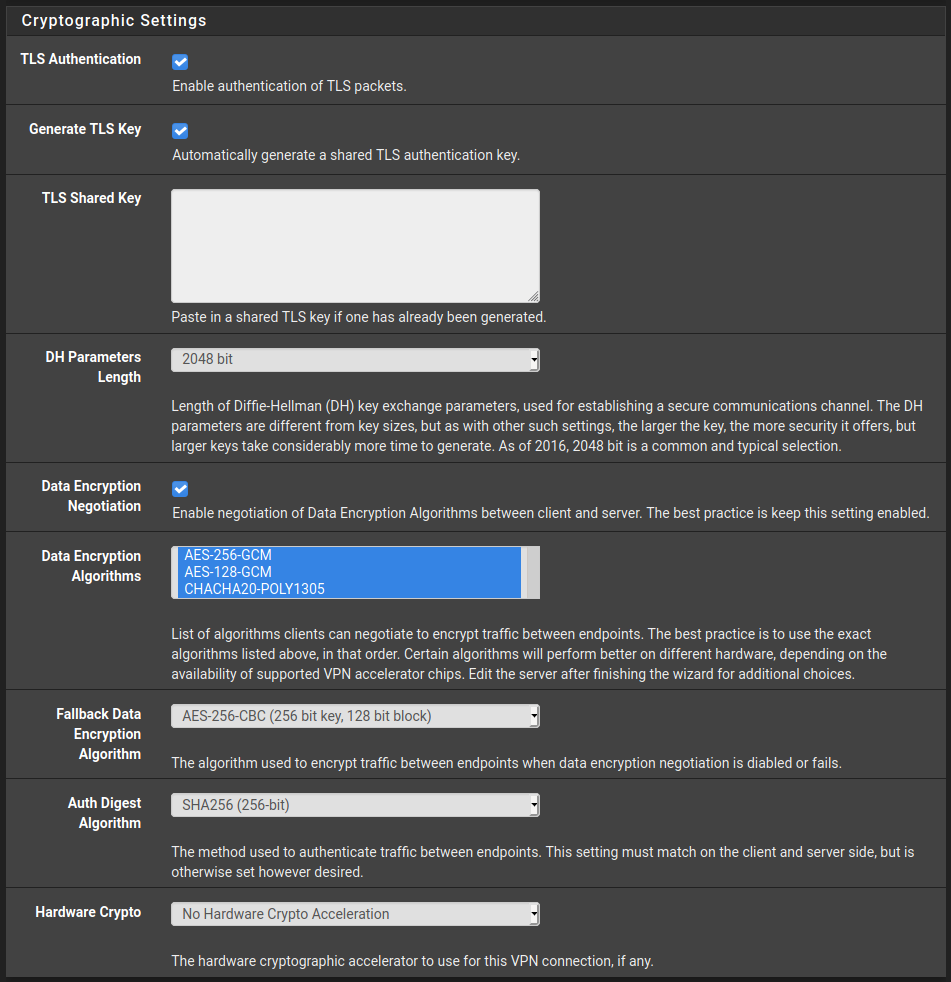
Again we can mostly go with the default here. Just make sure TLS Authentication and Generate TLS Key are selected as explained in the recipe.
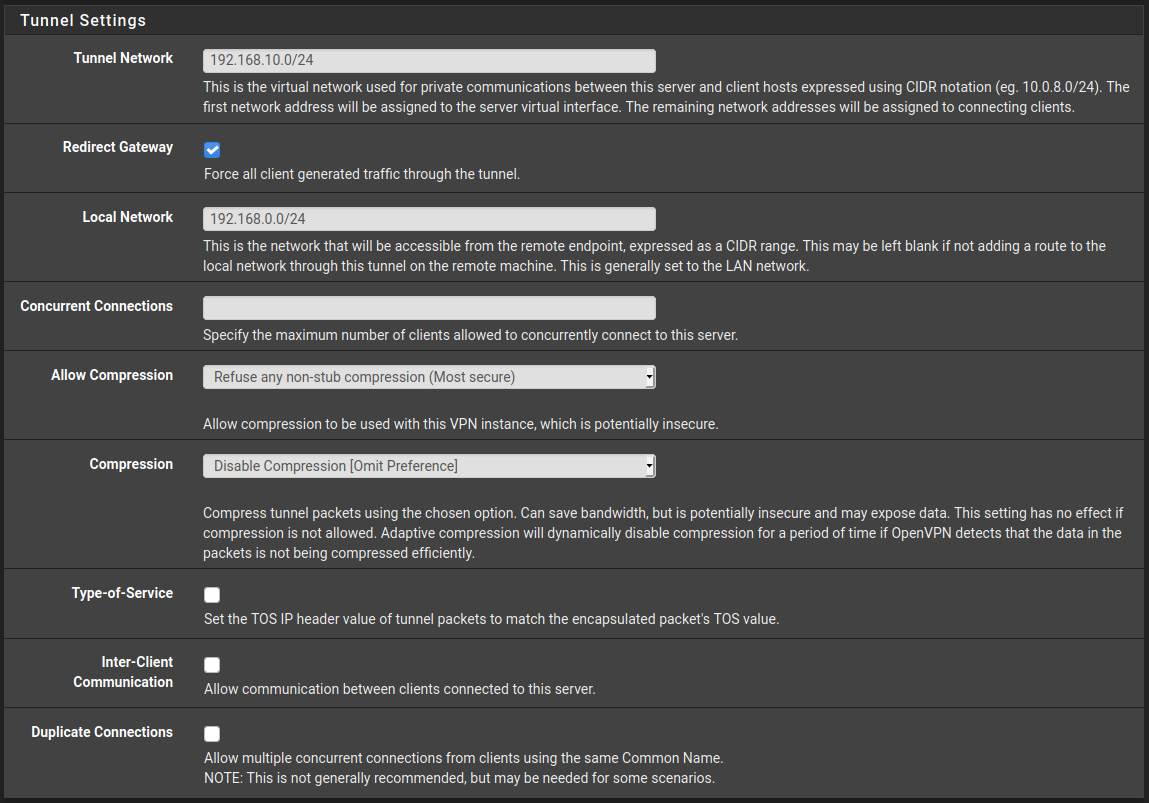
Next is the tunnel settings, this is where you will want to change a few values.
-
Tunnel network. I Chose 192.168.10.0/24 here because my home network is on 192.168.0.0/24. The 10 was just an arbitrary number. You can choose whatever you'd like really.
-
Redirect Gateway. I've enabled this as one of the main reasons for wanting to setup a vpn is for security when on public networks so I want all my traffic to be forced through the VPN.
-
Local Network. As mentioned earlier my local network is 192.168.0.0/24 but you should enter yours here. So if it was 192.168.1.0/24 you'd enter that here for example.
The rest I have left as the default but feel free to explore compression and what that means for security if bandwidth is a concern to you.
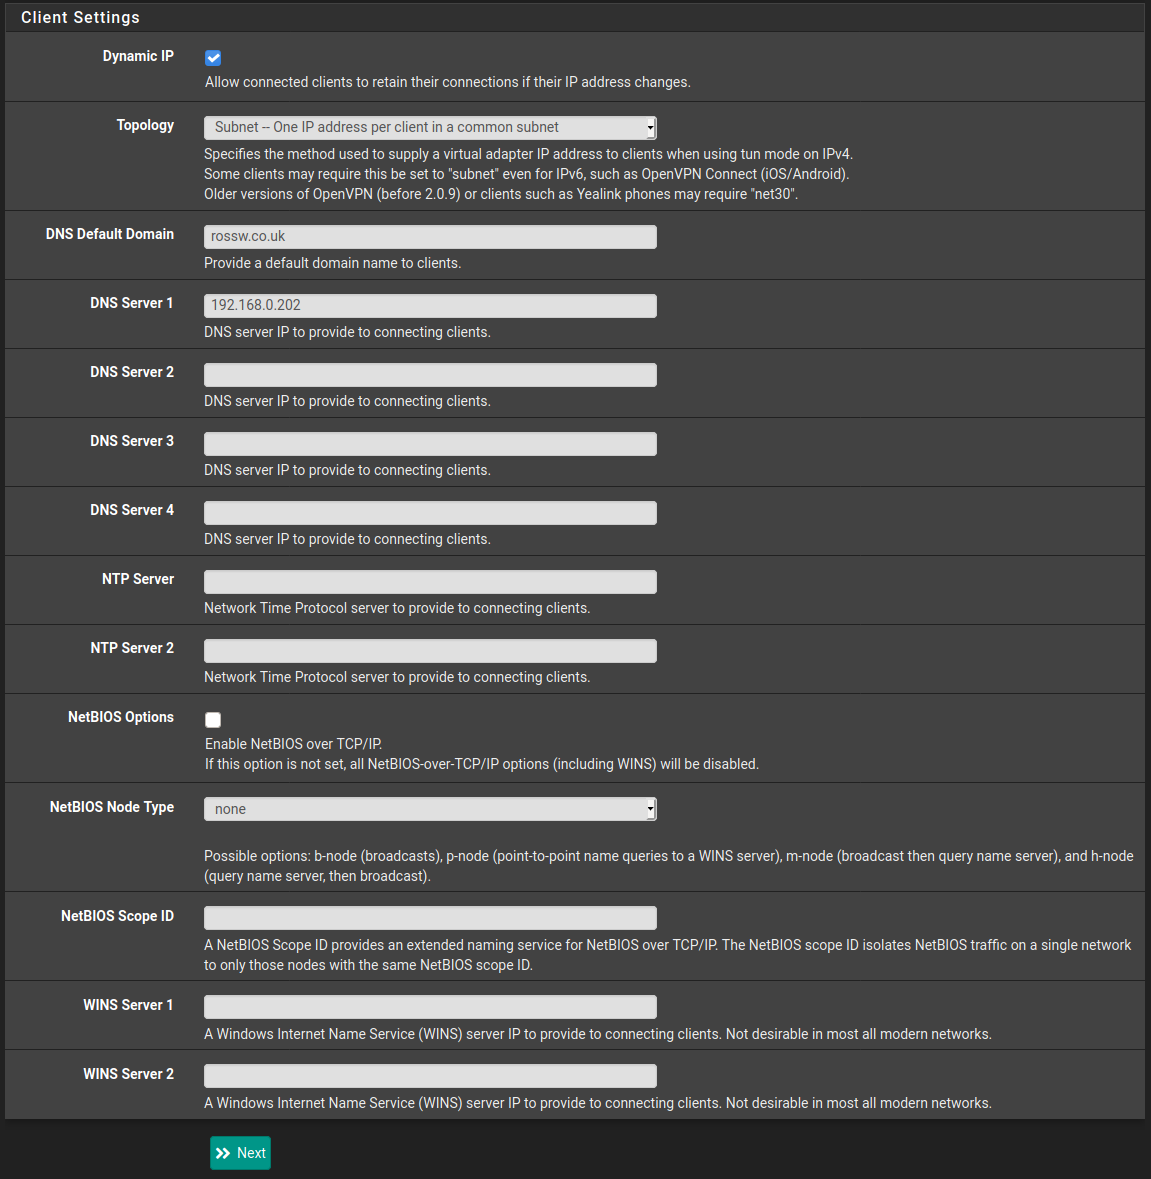
Finally we have client settings. Here I just provide the ip address of my pi-hole for the DNS as I want all my DNS to go through that.
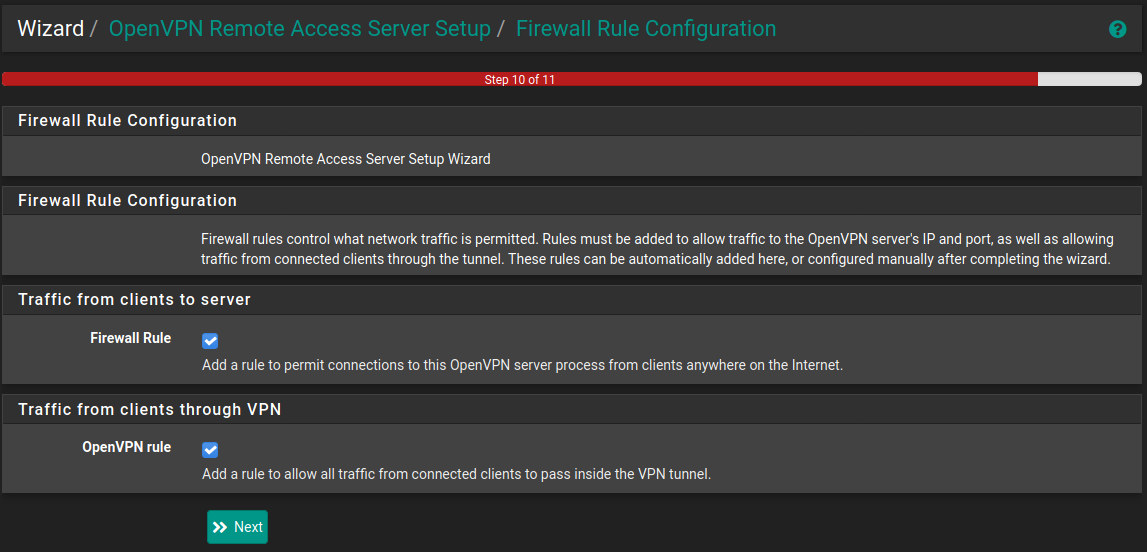
Step 5 - Firewall Configuration
On this final screen we tell pfSense to create the relevant firewall rules for allowing VPN connections and traffic through the tunnel.
This will allow connections from anywhere to attempt to connect to the VPN, if you'd like to lock this down then make sure you edit the firewall rules accordingly.
Finished! - but not quite...
The final screen lets you know that the server configuration is complete. But we aren't quite finished yet.

Remember how in the first step I mentioned we need to create a user? Let's do that now.
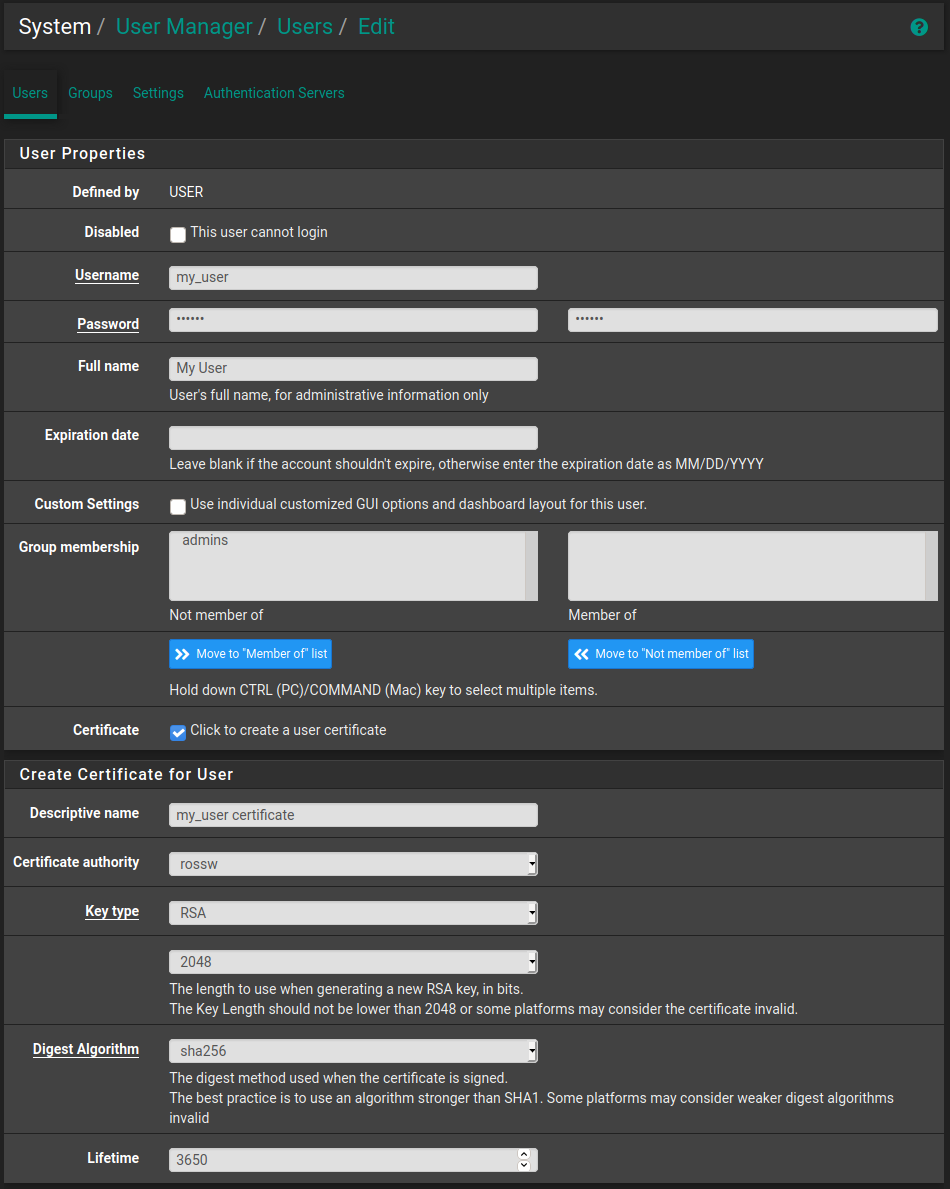
Step 6 - Adding a User
Navigate to System -> User Manager then click the Add button.
Fill in your desired Username, Password and Full name. I already have a user for this so I've just filled in some example information.
It is also important to click the "Click to create a user certificate" check box so that a certificate that the user will need to authenticate with OpenVPN is generated.
Give this a Descriptive name and select the certificate authority we created when setting up OpenVPN. The defaults are fine for the rest of it. Then simply scroll down a click Save.
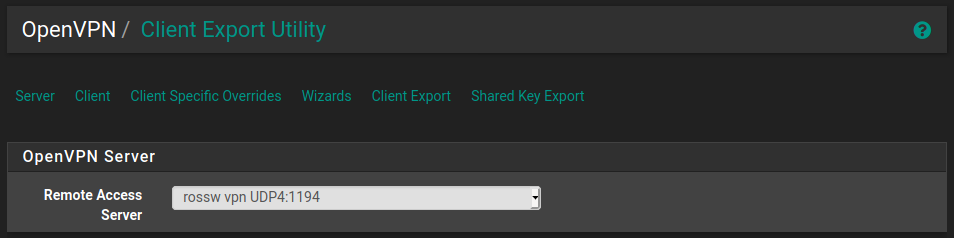
Step 7 - Client Export
As explained in the recipe the easiest way to export configuration for different VPN clients is to use the OpenVPN Client Export Package.
This can be done by navigating to System -> Package Manager then going to Available Packages and installing the one called openvpn-client-export.
This will give us a new option under VPN -> OpenVPN called Client Export. Simply navigate here and then choose the Remote Access Server, in this case we only have a single OpenVPN server so it will already be selected for us. The rest of the settings can be left at default.
Scroll down to the bottom and there will be a list of OpenVPN clients, click the one that is relevant to yourself and it should begin the download. You can find more information in the documentation.
Initially I am just going to set this up on my Android phone so I'll choose Android under Inline Configurations.
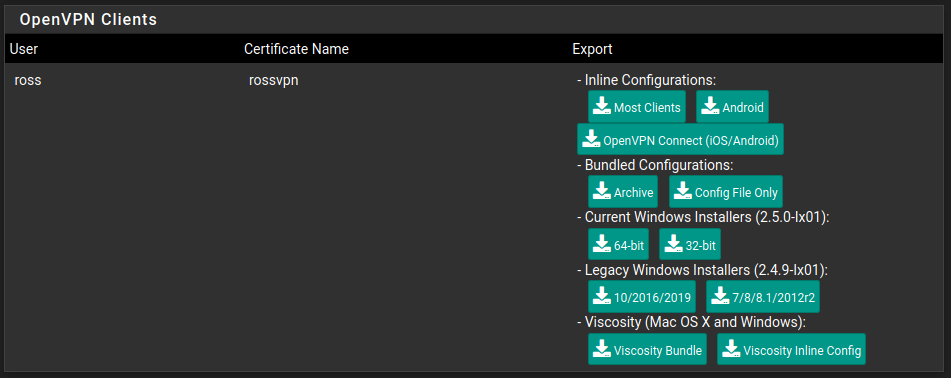
It is vitally important that you keep this configuration safe and secure. If anybody gets access to it they will be able to connect to your VPN.
Once you have the configuration downloaded simply import it into your VPN client of choice and you should be able to connect!
Finally Finished!
So let's give it a whirl. I'll open up the OpenVPN client on my phone, import the configuration, try to connect and enter my password when prompted.
To make sure it's working I'll try to browse to my TrueNAS web UI and see if it loads.
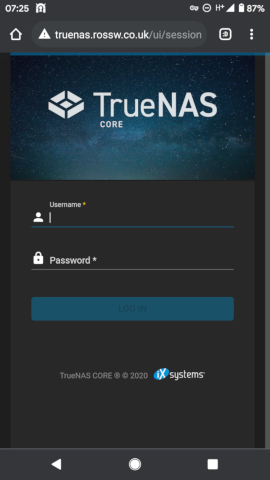
Success!
I can now securely access my home network from anywhere in the world and all my DNS requests are going through my Pi-hole for ad blocking on the move.