Netbooting the Ubuntu 21.04 Installer
Ubuntu 21.04 Hirsute Hippo is here! Today I'm going to look at how to use pfSense to boot into the installer over the network. I am going to be installing the Desktop version but the same would apply to the Server version as well.
There are a couple of reasons that I can think of that you might want to do this.
- If you have a lot of computers you'd like to install on at once, you don't have to have multiple usb drives or CDs.
- You misplaced your usb drive that was large enough to fit in the installer on it.
I would be doing this because of the second reason... and because it's a fun learning experience.
I have loosely followed the instructions from this guide.
Gathering all the files
There are a few files that we need to get this to work. Two from syslinux and two from the ubuntu ISO itself. We also need to write a short configuration file.
Let's start with syslinux. We need pxelinux.0 and ldlinux.c32. The easiest way I find to get these is to download syslinux from kernel.org and just extract them.
$ cp bios/core/pxelinux.0 ~/netboot-files/
$ cp bios/com32/elflink/ldlinux/ldlinux.c32 ~/netboot-files/
Now we have those we need initrd and vmlinuz from the Ubuntu 21.04 installer. So let's download it, mount it and grab those files.
$ sudo mkdir /media/iso
$ sudo mount ubuntu-21.04-desktop-amd64.iso /media/iso
$ cp /media/iso/casper/{initrd,vmlinuz} ~/netboot-files/
$ sudo umount /media/iso
Finally we need to create a configuration file for pxelinux.
$ mkdir ~/netboot-files/pxelinux.cfg/
$ touch ~/netboot-files/pxelinux.cfg/default
Then using your favourite text editor put the following into the default file.
DEFAULT install
LABEL install
    KERNEL vmlinuz
    INITRD initrd
    APPEND root=/dev/ram0 ramdisk_size=4000000 ip=dhcp url=https://releases.ubuntu.com/21.04/ubuntu-21.04-desktop-amd64.iso
Here I've set the size of the ramdisk to ~4GB, the thought behind this was that the iso is 2.8GB and we need some room for the actual installation. This might be way too much, I haven't really experimented with it but it works.
This is an extremely basic configuration, you can go quite in depth with pxelinux. There are modules for doing all sorts of things such as creating menus. I'd recommend reading the wiki for more information.
If you've followed all the steps above you should have:
$ ls -AlR ~/netboot-files
/home/ross/netboot-files:
total 126115
-r--r--r-- 1 ross ross 115774131 Apr 24 14:59 initrd
-rwxrwxr-x 1 ross ross    122308 Apr 24 14:49 ldlinux.c32
-rw-rw-r-- 1 ross ross     46909 Apr 24 14:49 pxelinux.0
drwxrwxr-x 2 ross ross         3 Apr 24 15:02 pxelinux.cfg
-r--r--r-- 1 ross ross  14732384 Apr 24 14:59 vmlinuz

/home/ross/netboot-files/pxelinux.cfg:
total 1
-rw-rw-r-- 1 ross ross 0 Apr 24 15:02 default
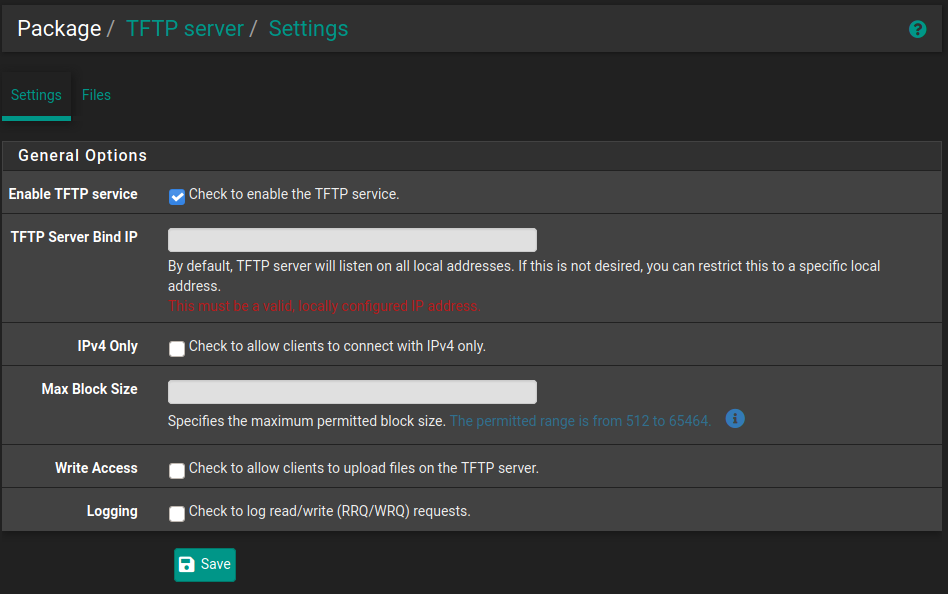
Setting up TFTP in pfSense
Since pfSense is already acting as the dhcp server it makes it really simple to get everything up and running. The only thing we need is a TFTP server which pfSense has a package for.
This can be done by navigating to System -> Package Manager then going to Available Packages and installing the one called tftpd.
Once this is installed you can navigate to Services->TFTP Server and check "Enable TFTP service" if it isn't already enabled.
Now we need to get our files from ~/netboot-files onto pfSense in the correct location. You can use the webUI to do this by going to the Files section but you can only do one file at time as far as I can tell and it won't handle the folder containing the configuration.
The easiest way is just to use scp.
$ scp -r ~/netboot-files/* admin@192.168.0.1:/tftpboot/
initrd         100%  110MB  93.3MB/s   00:01
ldlinux.c32    100%  119KB  60.2MB/s   00:00
pxelinux.0     100%   46KB  46.2MB/s   00:00
default        100%  185   621.3KB/s   00:00
vmlinuz        100%   14MB  92.9MB/s   00:00
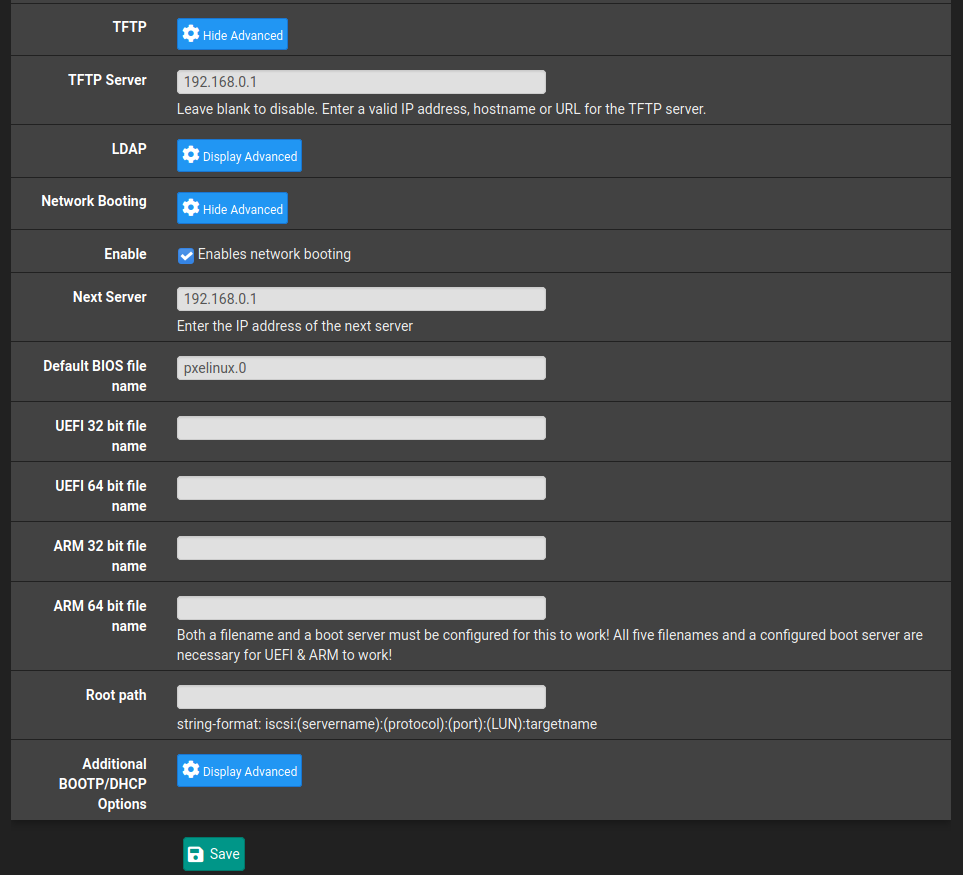
pfSense DHCP Configuration
Now that TFTP is up and running there's some configuration we need to do for the dhcp server to tell enable network booting and point it at our TFTP server.
Navigate to Services->DHCP Server and scroll all the way down to near the bottom where you should see TFTP and Network Booting options. Click Display Advanced to see all the options. Check the enable box and then there are just a few fields we need to fill in. The IP address for my pfSense is 192.168.0.1 but change your to suit.
Installing Ubuntu!
That's everything we need to do in pfSense. We should now to be able to boot over the network so let's give it a go.
I'm going to use a virtual box VM for this so I can easily capture the process but it absolutely works on physical hardware but you may have to tweak some BIOS settings since this particular setup is not using UEFI.
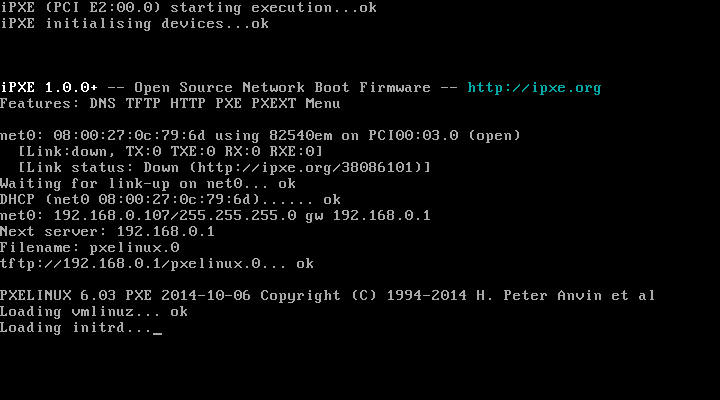
It's found our TFP server and is loading the ramdisk.
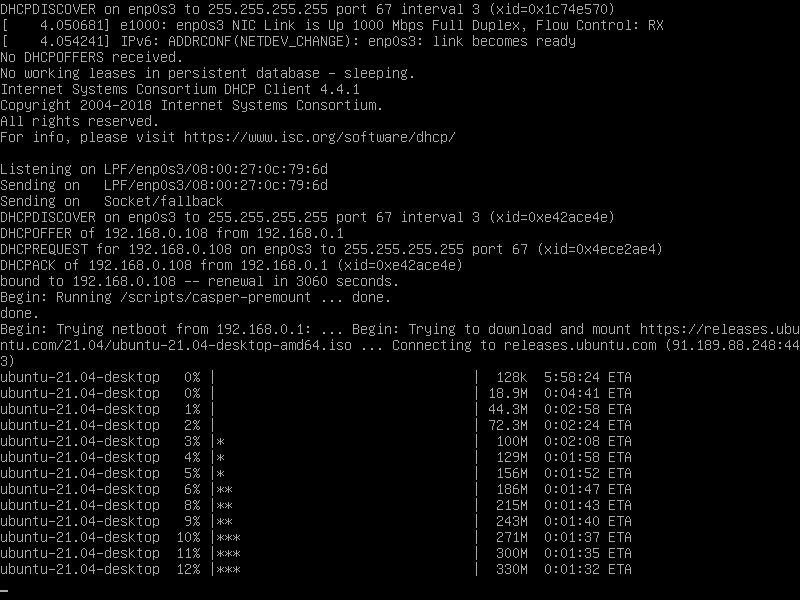
Downloading of the ISO has started.
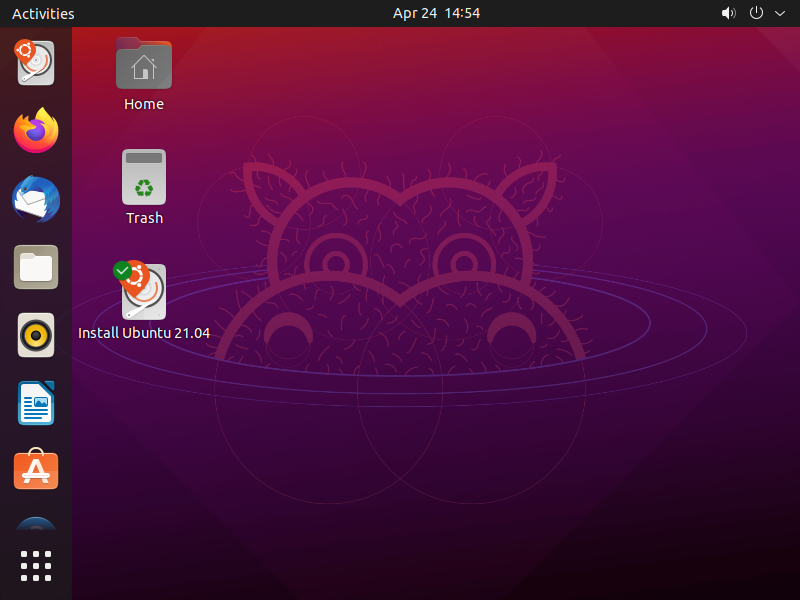
And a few minutes later we are in! We can now install Ubuntu 21.04.
Summary
pfSense makes this whole process fairly painless with very minimal configuration required thanks to it's plugins. If you are not using pfSense I recommend following the guide I linked for setting up dhcp and TFTP manually.
These steps are a very minimal configuration and what if we wanted to be able to serve two different distros installers over the network, say we had an LTS for servers and the latest version for any desktops? Well, this should be possible with syslinux/pxelinux and I definitely intend to dive deeper into it in future and explore it's modules.
If any of you have any cool setups for this then get in touch and let me know. Contact details be found here.