Aug 08, 2021
Recently, I have seen a number of people looking for hosting for their discord bots. Many people go to services like Heroku, but if you would like full VPS and full control, then AWS is a great option, especially since there is a free tier for one year. However, AWS has a lot of different products and the UI can be a little overwhelming so I thought I would write a quick brief guide on how to get started. This, however, is by no means a deep dive into all the features/products of AWS.
Getting Started
The first thing you need to do is head over to AWS and create an account. This is not the same account that you would use for Amazon's website so you will need to create a new one. Make sure you setup 2FA as well.
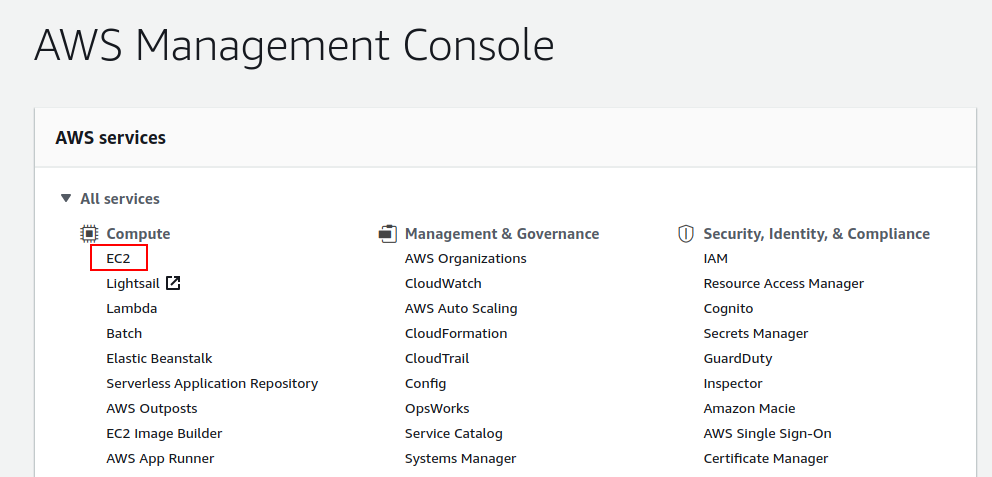
Once you have your account and are logged in, head over to the management console and under All Services->Compute, select EC2. This is basically amazon's name for a VPS, similar to a droplet on DigitalOcean.
Note: If you wish to change the region, you can do so in the top right, next to your account name. It would make sense to do this now before creating your EC2 instance.
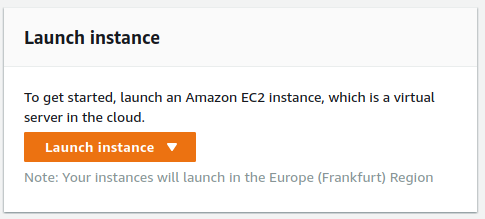
Launch instance
The EC2 Dashboard can seem very overwhelming at first as there are a lot of options, but the only thing we need right now is the big orange "Launch instance" button.
Step 1: Choose an Amazon Machine Image (AMI)
The first step is selecting which operating system you would like to run on your EC2 instance. Make sure you choose one that is "Free tier eligible" if you want to take advantage of that for 12 months. For the purpose of this guide, I'm going to go with Ubuntu Server 20.04 LTS. If you are new to Linux, it is a great option as there are many learning resources available online; I'd definitely recommend it for getting started.

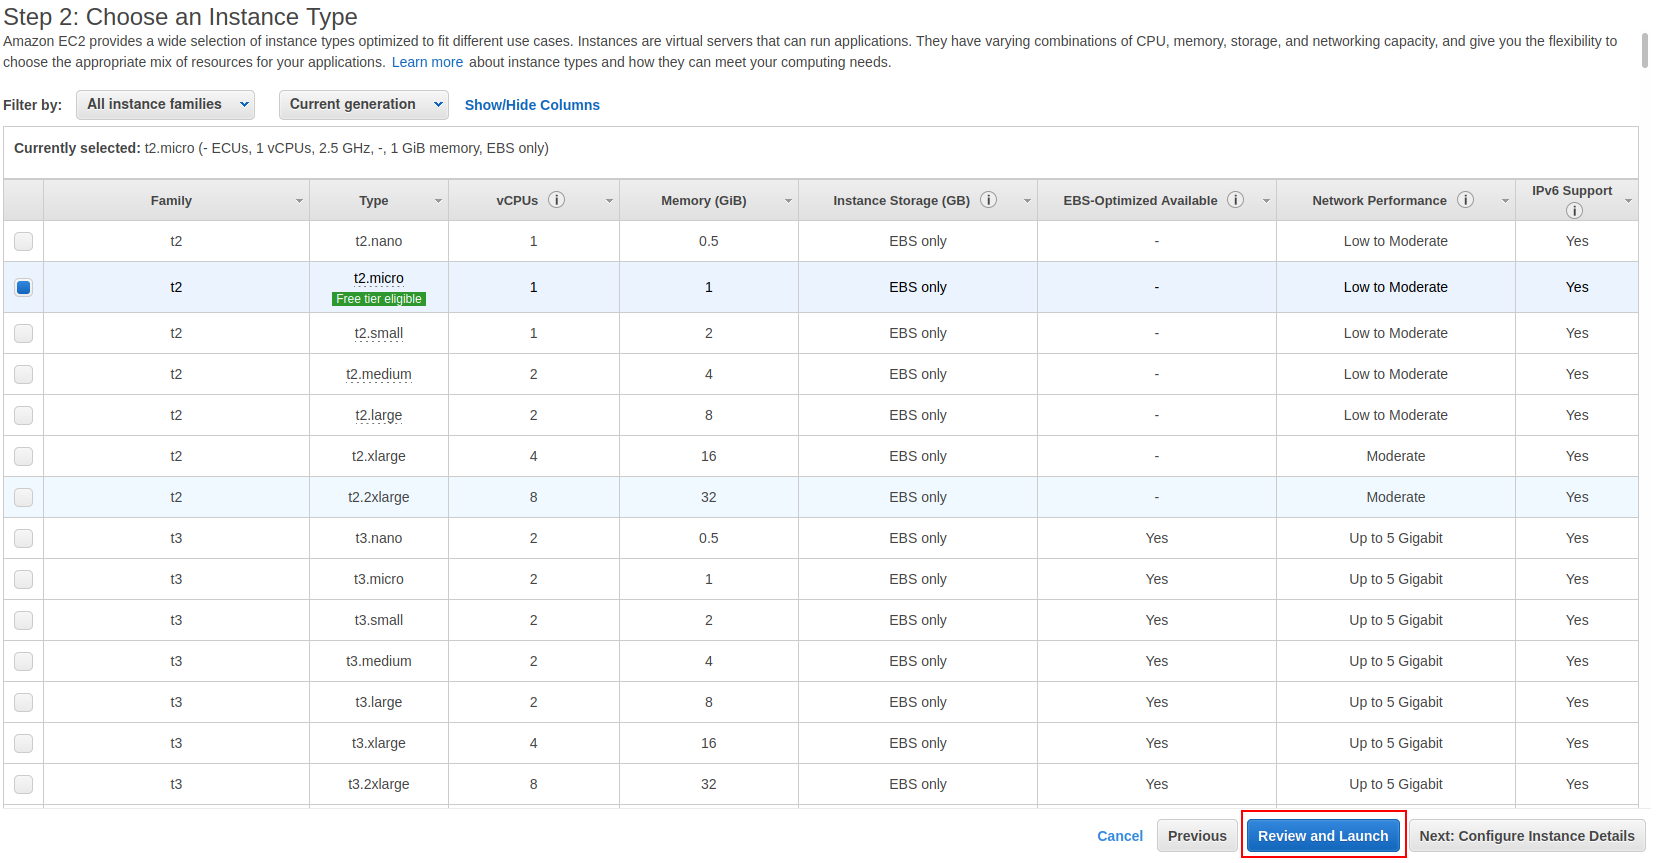
Step 2: Choose an Instance Type
Next we choose our instance type. There are plenty of options here (everything on AWS seems to be overwhelming!). For getting started, choose the t2.micro as this is free tier eligible and has 1gb of RAM which will be plenty for starting out. You can always upgrade later to one of the other instance types if your needs require it.
Depending on what you are planning to run on your VPS, you can probably now just click the big blue "Review and Launch" button. This would be suitable for anything that doesn't require an inbound connection, such as a discord bot. However, if you want to host a website, see the optional step below.
If you do not require any inbound connection other than SSH, you can skip the next step and just click the "Review and Launch" button.
Note: One thing that could be done to restrict access is to change the security group settings so that SSH is only accessible from your own IP address rather than the entire world
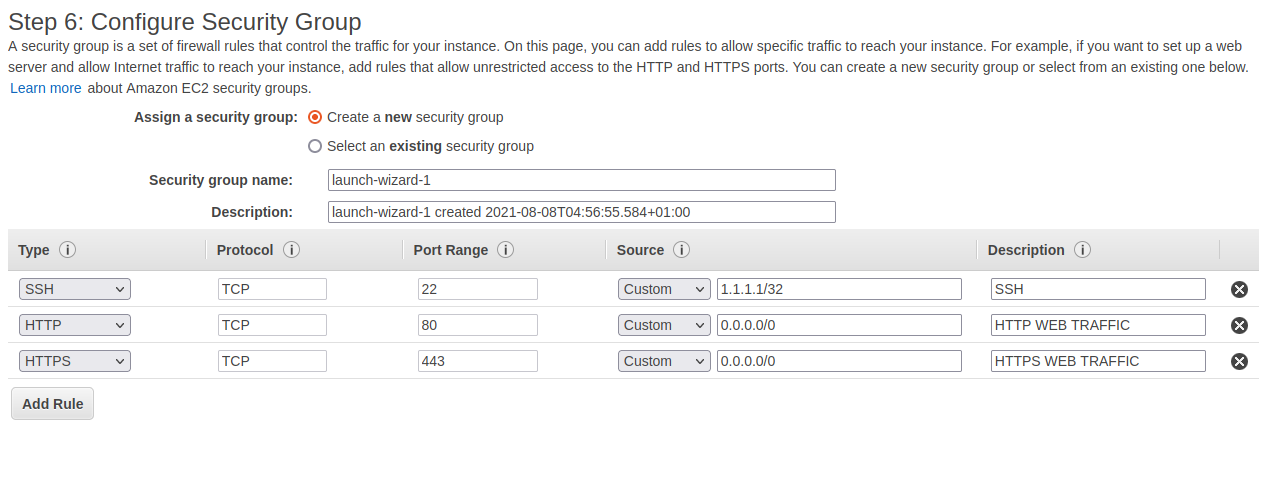
Optional: Step 6: Configure Security Group
Skip ahead to step 6 of the configuration. This is where you can configure the security group. This is basically the firewall and defines which ports are open and where they can be accessed from. The change mentioned above about restricting SSH to your own IP can be done here. Simply change the Source to your own IP. For example: If your IP address was 1.1.1.1, you would enter "1.1.1.1/32".
Here are some example options that would allow HTTP/HTTPS web traffic and a connection from SSH only on my own IP, shown as 1.1.1.1 as an example. Make sure you replace this with your own.
Launch!
Once you've completed the steps above, click "Review and Launch".
Make sure you are happy with all your choices, then click "Launch".
SSH Keys
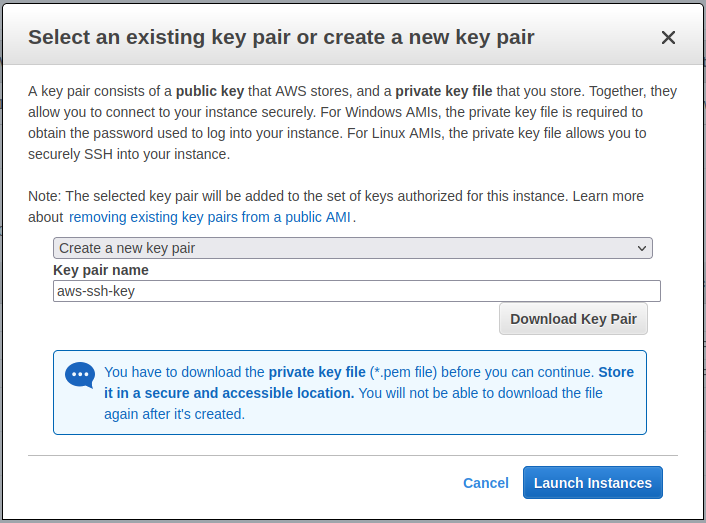
You will now be prompted to create an SSH key pair for accessing the EC2 instance. Choose "Create a new key pair" and give it a name, then click "Download Key Pair".
Make sure you save this somewhere secure and not lose it. If you do, you will no longer be able to gain access via SSH.
Note: I'm not going to go into using SSH and keys as it is outside of the scope of this guide. However, here is a guide for using PuTTY on Windows with the key
pair you have just downloaded.
Once you have downloaded the key and saved it somewhere safe, click Launch Instances.
Launched!
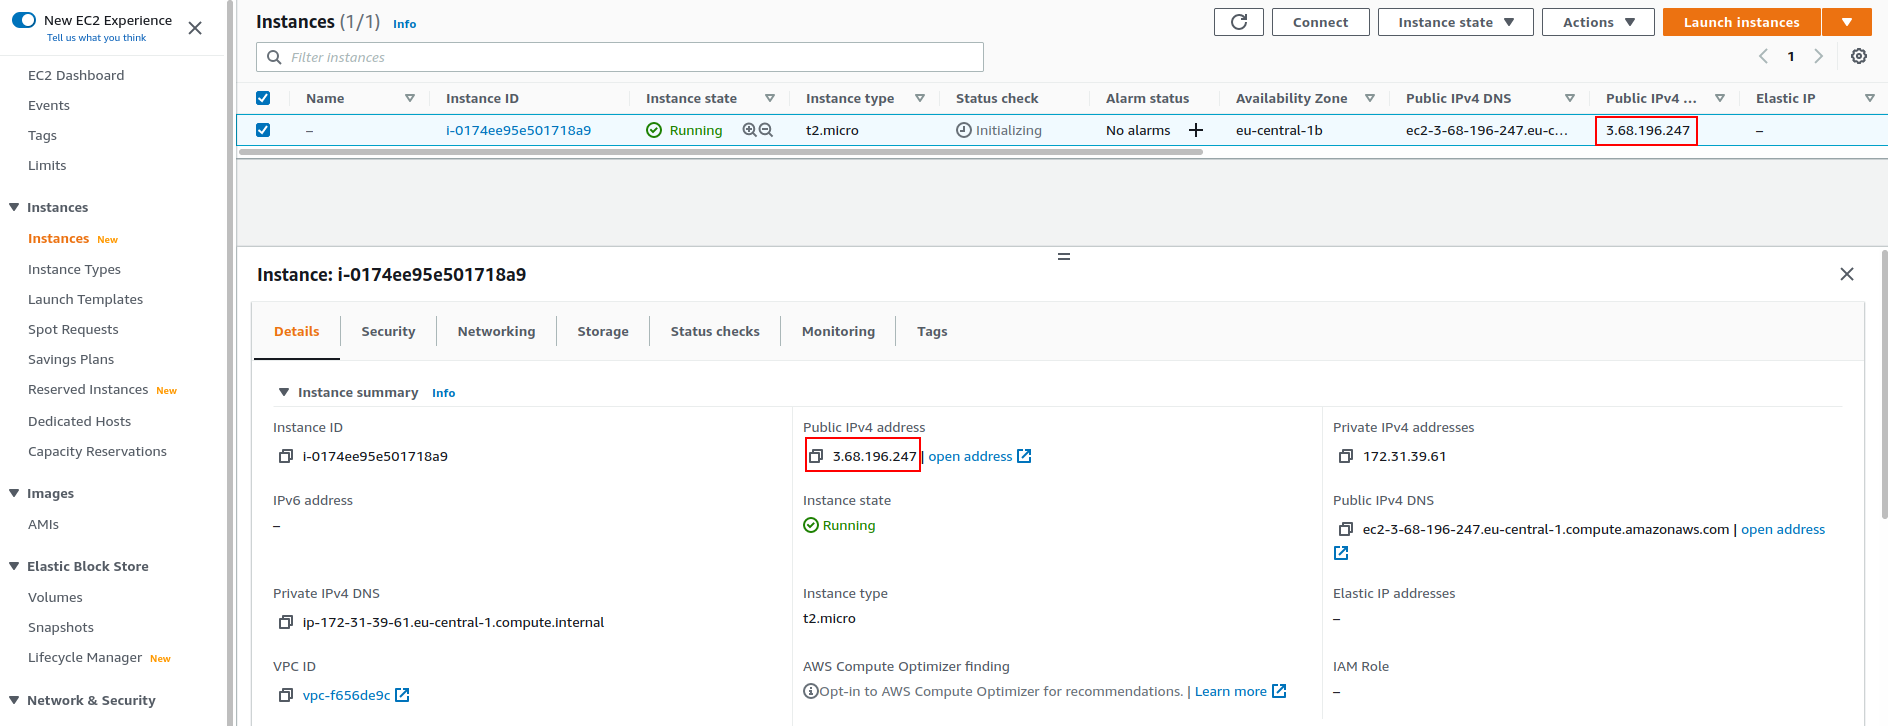
You can now go back to your dashboard and choose instances on the navigation panel. You should see your instance and its status. Once it is running, we can connect via SSH. You can click on it for further details in the panel below.
To connect, you will need to make note of the Public IPv4 Address. This can be seen in the instance list at the top or within the details tab if you select the instance.
Connecting
Let's connect by SSH. The default user is ubuntu if you chose Ubuntu Server, and your IP address can be found on the AWS web console as mentioned above
$ ssh ubuntu@3.68.196.247 -i aws-key-pair.pem
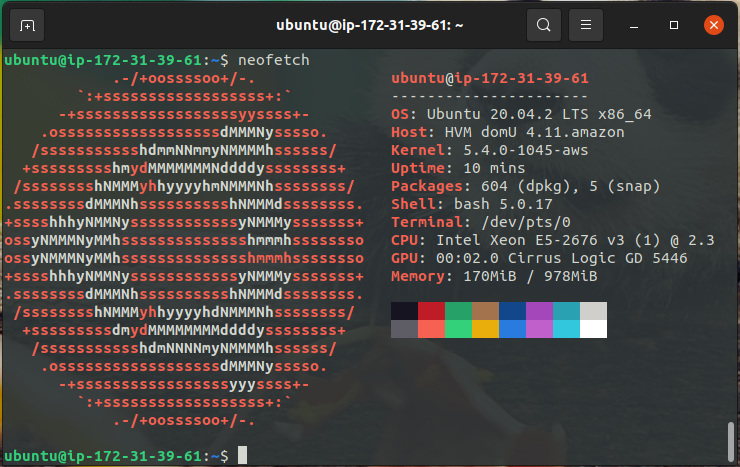
All connected via SSH!
Summary
Hopefully, this guide was easy to follow. AWS is definitely overwhelming at first and there is still a lot I need to learn about it, but as you can see, it's really straight forward to set up with a basic VPS that you can run whatever you need to.
If any of you have any further questions or suggestions, please get in touch! Contact details be found here.
Apr 24, 2021
Ubuntu 21.04 Hirsute Hippo is here! Today I'm going to look at how to use pfSense to boot into the installer over the network. I am going to be installing the Desktop version but the same would apply to the Server version as well.
There are a couple of reasons that I can think of that you might want to do this.
- If you have a lot of computers you'd like to install on at once, you don't have to have multiple usb drives or CDs.
- You misplaced your usb drive that was large enough to fit in the installer on it.
I would be doing this because of the second reason... and because it's a fun learning experience.
I have loosely followed the instructions from this guide.
Gathering all the files
There are a few files that we need to get this to work. Two from syslinux and two from the ubuntu ISO itself. We also need to write a short configuration file.
Let's start with syslinux. We need pxelinux.0 and ldlinux.c32. The easiest way I find to get these is to download syslinux from kernel.org and just extract them.
$ cp bios/core/pxelinux.0 ~/netboot-files/
$ cp bios/com32/elflink/ldlinux/ldlinux.c32 ~/netboot-files/
Now we have those we need initrd and vmlinuz from the Ubuntu 21.04 installer. So let's download it, mount it and grab those files.
$ sudo mkdir /media/iso
$ sudo mount ubuntu-21.04-desktop-amd64.iso /media/iso
$ cp /media/iso/casper/{initrd,vmlinuz} ~/netboot-files/
$ sudo umount /media/iso
Finally we need to create a configuration file for pxelinux.
$ mkdir ~/netboot-files/pxelinux.cfg/
$ touch ~/netboot-files/pxelinux.cfg/default
Then using your favourite text editor put the following into the default file.
DEFAULT install
LABEL install
    KERNEL vmlinuz
    INITRD initrd
    APPEND root=/dev/ram0 ramdisk_size=4000000 ip=dhcp url=https://releases.ubuntu.com/21.04/ubuntu-21.04-desktop-amd64.iso
Here I've set the size of the ramdisk to ~4GB, the thought behind this was that the iso is 2.8GB and we need some room for the actual installation. This might be way too much, I haven't really experimented with it but it works.
This is an extremely basic configuration, you can go quite in depth with pxelinux. There are modules for doing all sorts of things such as creating menus. I'd recommend reading the wiki for more information.
If you've followed all the steps above you should have:
$ ls -AlR ~/netboot-files
/home/ross/netboot-files:
total 126115
-r--r--r-- 1 ross ross 115774131 Apr 24 14:59 initrd
-rwxrwxr-x 1 ross ross    122308 Apr 24 14:49 ldlinux.c32
-rw-rw-r-- 1 ross ross     46909 Apr 24 14:49 pxelinux.0
drwxrwxr-x 2 ross ross         3 Apr 24 15:02 pxelinux.cfg
-r--r--r-- 1 ross ross  14732384 Apr 24 14:59 vmlinuz

/home/ross/netboot-files/pxelinux.cfg:
total 1
-rw-rw-r-- 1 ross ross 0 Apr 24 15:02 default
Setting up TFTP in pfSense
Since pfSense is already acting as the dhcp server it makes it really simple to get everything up and running. The only thing we need is a TFTP server which pfSense has a package for.
This can be done by navigating to System -> Package Manager then going to Available Packages and installing the one called tftpd.
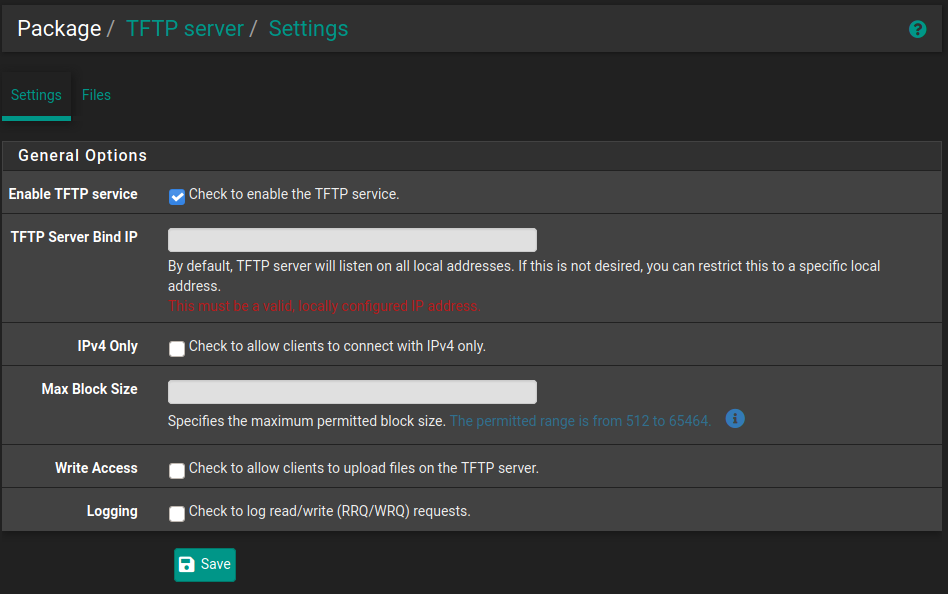
Once this is installed you can navigate to Services->TFTP Server and check "Enable TFTP service" if it isn't already enabled.
Now we need to get our files from ~/netboot-files onto pfSense in the correct location. You can use the webUI to do this by going to the Files section but you can only do one file at time as far as I can tell and it won't handle the folder containing the configuration.
The easiest way is just to use scp.
$ scp -r ~/netboot-files/* admin@192.168.0.1:/tftpboot/
initrd         100%  110MB  93.3MB/s   00:01
ldlinux.c32    100%  119KB  60.2MB/s   00:00
pxelinux.0     100%   46KB  46.2MB/s   00:00
default        100%  185   621.3KB/s   00:00
vmlinuz        100%   14MB  92.9MB/s   00:00
pfSense DHCP Configuration
Now that TFTP is up and running there's some configuration we need to do for the dhcp server to tell enable network booting and point it at our TFTP server.
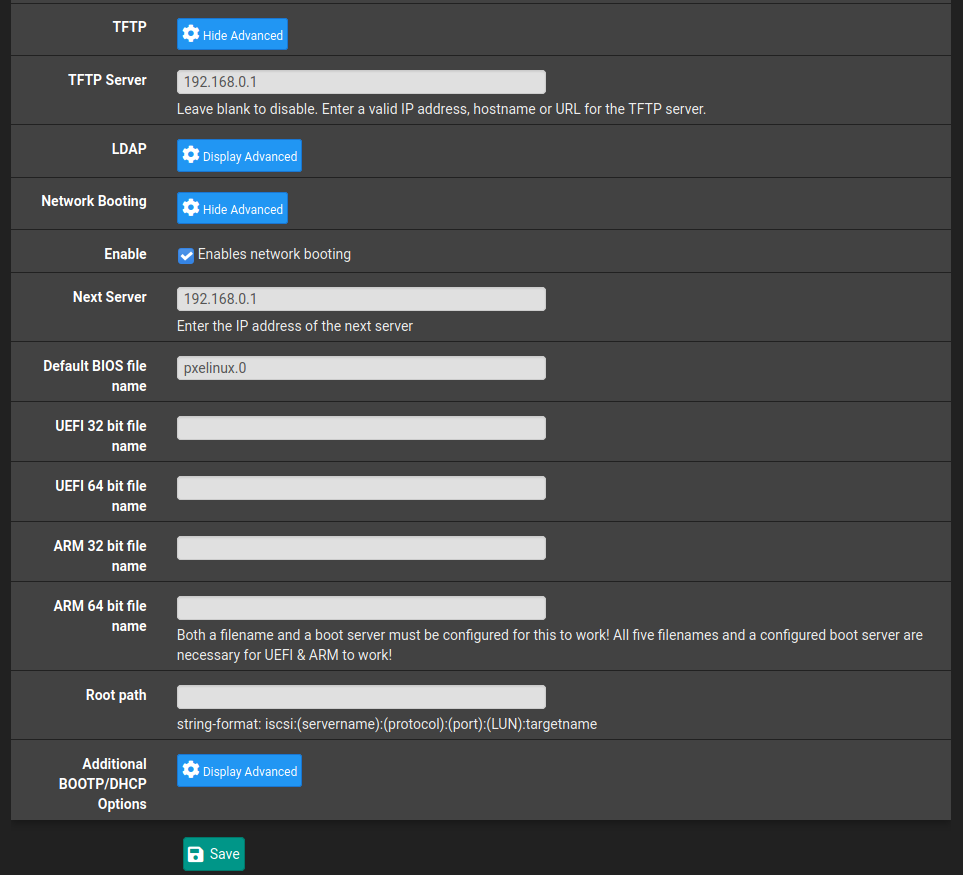
Navigate to Services->DHCP Server and scroll all the way down to near the bottom where you should see TFTP and Network Booting options. Click Display Advanced to see all the options.
Check the enable box and then there are just a few fields we need to fill in.
The IP address for my pfSense is 192.168.0.1 but change your to suit.
Installing Ubuntu!
That's everything we need to do in pfSense. We should now to be able to boot over the network so let's give it a go.
I'm going to use a virtual box VM for this so I can easily capture the process but it absolutely works on physical hardware but you may have to tweak some BIOS settings since this particular setup is not using UEFI.
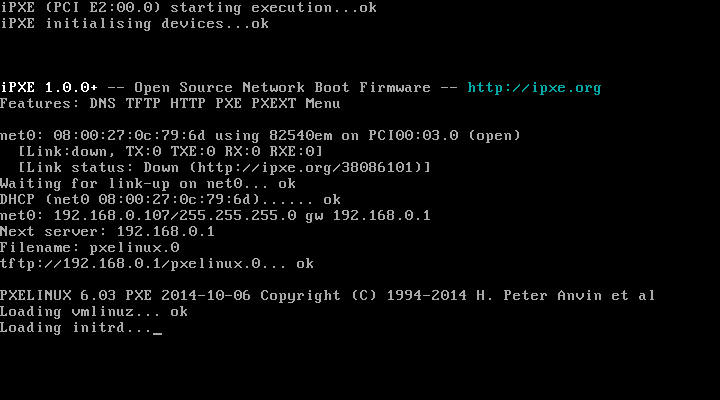
It's found our TFP server and is loading the ramdisk.
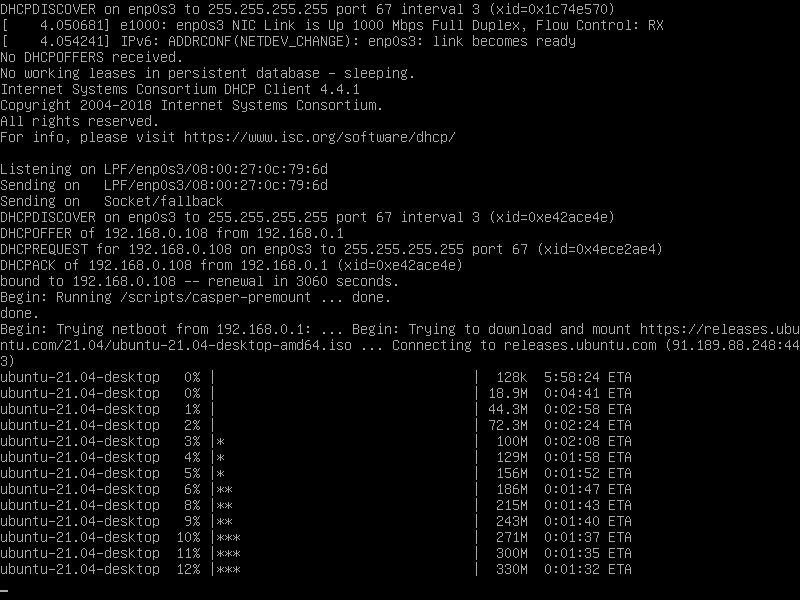
Downloading of the ISO has started.
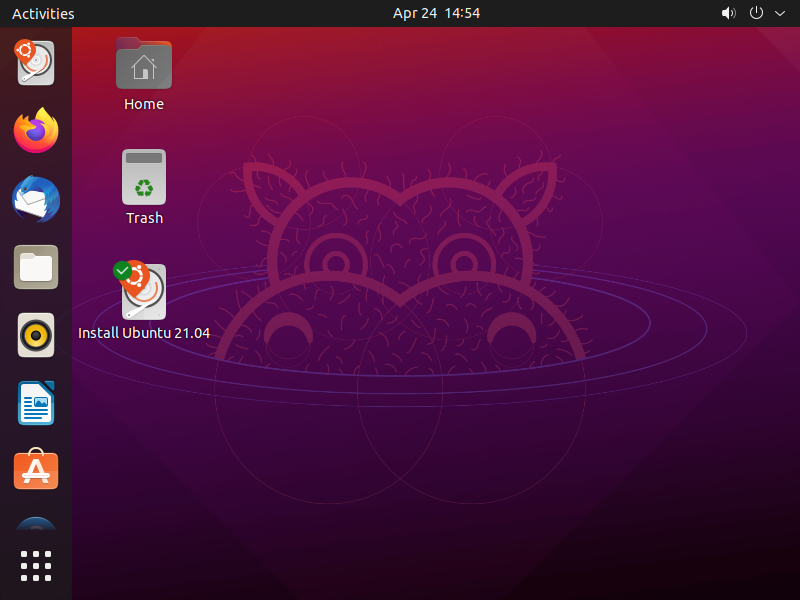
And a few minutes later we are in! We can now install Ubuntu 21.04.
Summary
pfSense makes this whole process fairly painless with very minimal configuration required thanks to it's plugins. If you are not using pfSense I recommend following the guide I linked for setting up dhcp and TFTP manually.
These steps are a very minimal configuration and what if we wanted to be able to serve two different distros installers over the network, say we had an LTS for servers and the latest version for any desktops? Well, this should be possible with syslinux/pxelinux and I definitely intend to dive deeper into it in future and explore it's modules.
If any of you have any cool setups for this then get in touch and let me know. Contact details be found here.
Apr 10, 2021
Currently on my main desktop machine my /home directory resides on it's own 256gb SSD with an ext4 filesystem. I want to move this to a ZFS file system to take advantage of snapshots and compression.
I have a TrueNAS VM running in proxmox (more on this in future posts) that /home then gets backed up to using an rsync cronjob. However as I mentioned previously I would like to be able to take advantage of ZFS snapshots when doing backups so I have decided to move /home to ZFS.
I run ubuntu 20.10 on my desktop PC so this is fairly straight forward. ZFS is supported out of the box in the kernel on ubuntu.
The only aspect that makes this a little bit messy is that I want to use ZFS on the existing SSD that currently has /home on it. I'll need to do quite a bit of juggling files!
I am going to performing these steps on the live filesystem. I would recommend using a LiveCD for performing these tasks where possible, it'll make it a bit easier.
Install ZFS tools
First of all, let's install the tools required for managing zfs using apt.
sudo apt install zfsutils-linux
Copy /home to a temporary location
The next thing to do is copy the entire contents of the /home directory that currently resides on the SSD to a temporary location. I have plenty of space on my main drive so I'm just going to create a folder there and copy everything to it but if you don't then feel free to use an external drive.
sudo mkdir /temp-hone
sudo cp -av /home/* /temp-home/
Using the -a flag with cp preserves all file attributes and copies recursively so there shouldn't be any strange file permission issues.
Edit fstab and un-mount the drive
Now that the /home directory has been safely copied to another location fstab can be edited to stop the partition being mounted at boot. For now we can simply comment out the relevant line incase something goes wrong and we need to revert this step.
sudo vim /etc/fstab

# /home was on /dev/sda1 during installation
# UUID=myuuid /home           ext4    defaults
Next we can un-mount the drive. We use the -lf flags for force and lazy un-mounting. Without this it won't work as there are programs running that are actively trying to access this file system. As I mentioned in the introduction, doing this in a live filesystem is less than ideal, which is why we had to take this step.
sudo umount -lf /dev/sda1
Copy /temp-home back to /home
Due to doing this live and having plenty of drive space we are going to copy the /temp-home/ to /home so that when we reboot everything is where ubuntu suspects it to be, this now resides on the main OS drive.
A reboot is required because the home drive was unmounted lazily and we need to be able to delete the partition(s) so that ZFS can do it's thing!
sudo cp -a /temp-home/* /home/
reboot
The system should come back up as if nothing has changed.
Use fdisk to delete partition
Before we can create the ZFS pool we need to delete all partitions from the second SSD, which is /dev/sda. For this we can use fdisk.
$ sudo fdisk /dev/sda

Welcome to fdisk (util-linux 2.36).
Changes will remain in memory only, until you decide to write them.
Be careful before using the write command.


Command (m for help): d
Selected partition 1
Partition 1 has been deleted.

Command (m for help): w

The partition table has been altered.
Calling ioctl() to re-read partition table.
Synching disks.
Using d to delete the partition as there was only one and then w to write the changes to the partition table.
Create a ZFS pool
The preparation is done so now we can finally create the ZFS pool. I'm going with mypool for lack of a better name but feel free to choose whatever you like. I also only have the one drive so don't need to worry about any sort of RAIDZ or mirroring. If you have multiple drives you'd like in your pool you'll want to check out the manpages for zpool create.
sudo zpool create mypool /dev/sda
Then just a quick zpool status to check it was created.
$ sudo zpool status
pool: mypool
state: ONLINE
scan: none requested
config:

    NAME        STATE     READ WRITE CKSUM
    mypool      ONLINE       0     0     0
    sda         ONLINE       0     0     0

errors: No known data errors
Create the ZFS filesystem
Next create the home filesystem in the pool.
sudo zfs create mypool/home
And check it was created.
sudo zfs list
NAME          USED  AVAIL     REFER  MOUNTPOINT
mypool        984K   225G      192K  /mypool
mypool/home   192K   225G      192K  /mypool/home
Enable Compression
Another benefit of ZFS is being able to use compression, there is a slight performance hit for doing this but since it's just my home directory I don't see this causing me any issues. So let's enable that now.
sudo zfs set compression=lz4 mypool
I'm going to go with lz4 since this gives a great compression ratio for minimal performance impact. ServeTheHome have a great article about it.
Copy /temp-home to it's new home
Great! Now that we have the filesystem and it is mounted at /mypool/home we can copy all the contents of the /temp-home/ directory to it once again using the cp -a command.
sudo cp -av /temp-home/* /mypool/home
Then check the pool usage and compression ratio.
$ sudo zfs list -o name,used,avail,refer,mountpoint,compressratio
NAME          USED  AVAIL     REFER  MOUNTPOINT     RATIO
mypool       54.9G   170G      192K  /mypool        1.22x
mypool/home  54.9G   170G     54.9G  /mypool/home   1.22x
And yep, we can now see that 54.9G is used up and the compression ratio is 1.22x. Compression has definitely paid off!
Delete everything in /home and mount the ZFS filesystem
Now to clean up and get the ZFS filesystem mounted at /home.
Delete the /home directory.
Then change the mountpoint of mypool/home to /home. And while we are it we can stop mypool from mounting by setting it's mountpoint to none
sudo zfs set mountpoint=/home mypool/home
sudo zfs set mountpoint=none mypool
Check that the files are there in /home.
$ ll /home
total 22
drwxr-xr-x  4 root root    4 Apr  6 12:40 ./
drwxr-xr-x 24 root root 4096 Apr  6 12:46 ../
drwx------  2 root root    2 Mar  4 17:42 lost+found/
drwxr-xr-x 46 ross ross   72 Apr  6 13:57 ross/
Awesome! Everything is there and now on a ZFS filesystem.
Reboot
Finally a quick reboot to make sure it mounts correctly on boot, there's no reason it shouldn't but better to be safe than sorry.
And everything is there as expected. Success!
$ ll /home
total 22
drwxr-xr-x  4 root root    4 Apr  6 12:40 ./
drwxr-xr-x 24 root root 4096 Apr  6 12:46 ../
drwx------  2 root root    2 Mar  4 17:42 lost+found/
drwxr-xr-x 46 ross ross   72 Apr  6 13:57 ross/
Summary
This process would have been a bit less painful if I'd use a LiveCD environment as I wouldn't have to have copies of copies of my home directory but overall it seems to have gone well.
I'm going to keep /temp-home around for a week or so just incase something goes wrong but once I'm happy everything is okay that will be deleted.
The next steps are to learn more about ZFS snapshots and replication so that I can start using these for my backups. I'm pretty new to ZFS and this is the first time I've created pools and file systems in this manor, my only previous experience was in TrueNAS which gives a nice web UI interface for performing all these tasks.
I've heard great things about sanoid so I'm probably going to go with that for my snapshot and backup solution. I'll of course write a blog post about it but for now I'm just going to keep my rsync cronjob around for backups.
If you have any questions or suggestions for using ZFS please get in touch. Contact details be found here.